Introduction: Let’s Talk Honestly About 3D Printing
You know, 3D printing sounds super fancy at first like something only engineers or tech geeks do. But the truth is, anyone can learn it. If you’ve ever looked at a small plastic part or toy and thought, “Wow, people actually make this at home?” then yeah, you’re already halfway into it. That’s what makes diving into the 3D printing basics you should know for beginners truly exciting — a simple step-by-step guide can help anyone start creating.
When I first started learning about 3d printing basics you should know for beginners, it felt confusing. Terms like “filament,” “nozzle temperature,” “G-code” — honestly, it was all a mess in my head. But once I understood how a 3D printer actually works step by step, things clicked. So, in this blog, I’ll try to keep it real and simple — no over-the-top jargon, no robotic talk. Just you, me, and some beginner-friendly tips.
Read Also : What is the Latest Invention in Science and Technology Today
What is 3D Printing? (In Simple Words)
So, before jumping into tools and setup, let’s quickly understand what is 3D printing — because that’s where most beginners mess up.
Think of it like this: instead of cutting something out of a big block (like traditional manufacturing), 3D printing builds an object layer by layer from the ground up. You feed the printer a design file — usually something you’ve created or downloaded — and it slowly “prints” your object using melted plastic, resin, or even metal in some advanced printers.
Imagine an inkjet printer, but instead of ink, it uses melted plastic filament. That’s basically what 3D printing is — making real objects out of digital designs. Pretty cool, right?
How Does a 3D Printer Work Step by Step?
Now this part — trust me — once you get it, everything else makes sense.
Here’s roughly how the process goes:
- Design or Download a Model
You start with a 3D design, usually made in software like Tinkercad, Fusion 360, or Blender. Beginners mostly download ready-made files from websites. Nothing wrong with that. - Slice the Model
This part confused me at first. “Slicing” basically means cutting your model into thin layers. You use software like Cura for that. It converts your 3D model into G-code — that’s the printer’s language. - Load the Filament
Filament is just the material your object is made of. PLA is best for beginners — easy to use, doesn’t need crazy temperature settings. - Start Printing
You transfer the sliced file (the G-code) to your printer — either through an SD card or cable. Then hit print. The printer nozzle heats up, melts the filament, and starts laying it down layer by layer. - Post-Processing
Once printing’s done, you might need to remove supports or smooth the surface. That’s called finishing — makes your object look clean and polished.
So yeah, that’s basically how a 3D printer works step by step. Not rocket science, just a few steps and a little patience.
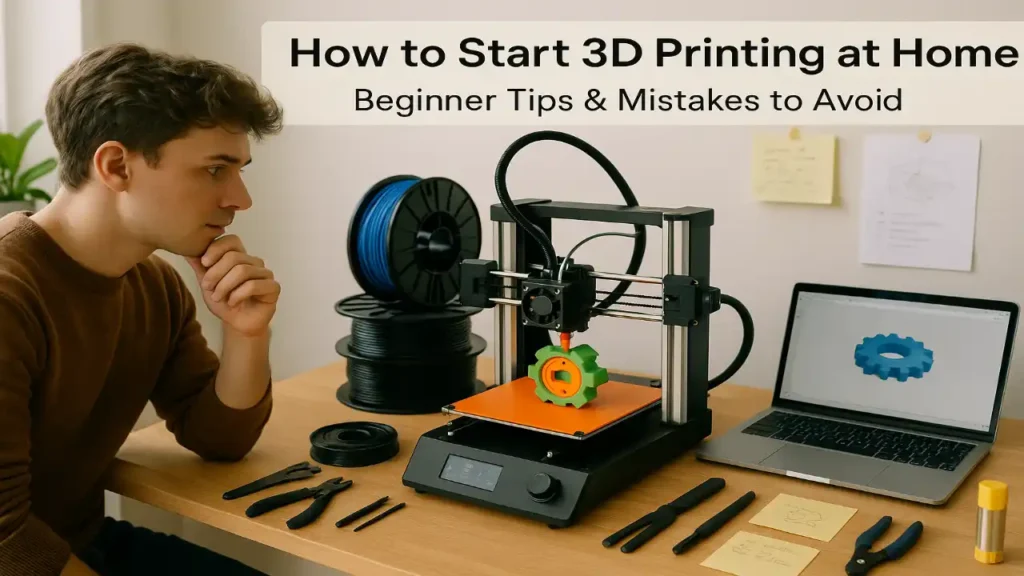
Getting Started at Home — The Right Way
Okay, so let’s say you’ve finally decided, “Yes, I want to try 3D printing at home.” Perfect. Here’s how you can start without burning your wallet or your patience.
1. Pick the Right Printer
If you’re a total beginner, don’t go for something too expensive. Start small. The Creality Ender 3 or Anycubic Kobra are great entry-level printers. They’re budget-friendly and have huge online communities in case you get stuck.
2. Choose Easy Filaments First
As I said earlier — PLA filament is perfect for starting out. It’s non-toxic, easy to print with, and doesn’t warp easily. Once you’re confident, you can try PETG or ABS — but those need more fine-tuning.
3. Set Up in a Safe Spot
Now, I didn’t know this before — 3D printers can get hot. So avoid keeping them near kids or flammable stuff. A small table near an open window is perfect. Good ventilation helps, especially if you’re printing for long hours.
4. Learn the Basics (Seriously)
Before you jump into your first print, take an hour to understand the 3d printing basics you should know for beginners — like what nozzle temperature means, how to level your bed, and how to clean your printer properly. These small things save you from huge frustration later.
Tools You’ll Need for Smooth Printing
Alright, let’s talk tools. You don’t need a huge setup, but a few essentials make life easier:
- Calipers: For measuring dimensions (trust me, precision matters).
- Tweezers or Pliers: To remove small supports.
- Glue Stick: Helps prints stick better to the bed.
- Scraper: To safely remove prints without damaging the surface.
- SD Card / USB Cable: For transferring your sliced files.
Optional but helpful tools include a digital thermometer (to check nozzle heat) and a small vacuum cleaner for filament dust.
How to 3D Print Something From a Picture (Fun Part!)
Now, this part always surprises people. You can actually 3D print something from a picture like your pet’s face or your own photo.
Here’s how it usually works:
- Take a clear photo with good contrast.
- Convert it into a lithophane using a website or app (basically turns your photo into a 3D model with depth).
- Slice it using your software and print it using white PLA.
- When light passes through it, you’ll see your photo appear — it looks amazing.
So yeah, 3D printing isn’t just about models or parts — it’s creative too!
Common Mistakes Beginners Make (and How to Avoid Them)
Alright, now comes the part where I tell you what not to do — because I’ve been there.
- Skipping Bed Leveling
If your first layer doesn’t stick properly, your print’s done for. Level the bed before every print — it takes two minutes but saves hours. - Using Wrong Temperature
Each filament has its sweet spot. Too cold, and it won’t stick; too hot, and it melts badly. Stick to manufacturer settings. - Ignoring Maintenance
Clean your nozzle and bed often. Dust or leftover filament can ruin prints without you even realizing. - Printing Without Supports
Some designs need supports — otherwise, they’ll droop mid-print. Use slicing software to auto-generate them. - Giving Up Too Soon
Your first few prints might fail. That’s okay. Everyone’s first layer is a bit messy — you’ll get better with each try.
3D Printing Basics You Should Know for Beginners (Quick Recap)
If I had to summarize everything for you:
- Learn the what, how, and why of 3D printing before touching the machine.
- Use simple materials (like PLA) to start.
- Keep patience — every failed print teaches you something.
- And yeah, enjoy the process! It’s more fun when you treat it like learning, not competition.
Final Thoughts
Look, 3D printing at home isn’t about building perfect stuff right away. It’s about curiosity — turning imagination into something real. And once you see your first successful print coming to life layer by layer… that feeling’s unbeatable.
So yeah, take your time, explore, fail a bit, fix it, and try again. Because once you get the hang of these 3d printing basics you should know for beginners, you’ll realize — the possibilities are endless.
3D printing is a process of creating physical objects from digital models by layering materials like plastic or resin. The printer reads a 3D file (usually in STL format) and builds the object layer by layer. It’s widely used in design, prototyping, and manufacturing.
Beginners should learn about 3D printer types (FDM, SLA, SLS), filament materials (PLA, ABS, PETG), and basic software for slicing models. Understanding design, calibration, and printing safety are key parts of the 3D printing basics you should know for beginners.
To get started, you need a 3D printer, slicing software (like Cura or PrusaSlicer), filament, and a digital model file. A basic toolkit for removing prints and leveling the bed also helps. Once you have these essentials, you’re ready to explore 3D printing basics hands-on.
You can convert a 2D image into a 3D model using online tools or design software like Blender or Tinkercad. The image is turned into a 3D surface or lithophane, which can then be sliced and printed. This is one of the coolest ways to learn how to 3D print something from a picture.
You can learn 3D printing through local makerspaces, community colleges, or workshops that offer 3D printing classes near you. Many online platforms also provide free 3D printing basics PDF guides and video tutorials to help you start from home.
- GEO vs SEO: How AI Search Optimization Tools Increase Organic Traffic Beyond Google Rankings - January 23, 2026
- Why Use AI Search Monitoring Tools in 2026? (Benefits, KPIs & ROI With Examples) - January 22, 2026
- How to Improve Brand Visibility in AI Search Engines in 2026 - January 21, 2026